STARTING THE COORDINATE ENTRY ASSIGNMENT
1. OPEN your Metric TITLEBLOCK drawing. The Titleblock drawing will be used for all your drawings; it is like getting a new sheet of paper except it is personalized to you.
2. SAVEAS this drawing as COORDINATE ENTRY to your H: drive.
3. Notice the name of the drawing in the top screen bar; it should be COORDINATE ENTRY.
4. See the Notes on COORDINATE ENTRY for review of how to use Absolute, Relative and Polar.
5. Switch to Model Space if in Layout/Paper Space.
6. Change to the OBJECT layer.
7. Using COORDINATE ENTRY draw the following two shapes for this Assignment.
8. Remember to turn off the Dynamic Input so you can do Coordinate Entry.
|
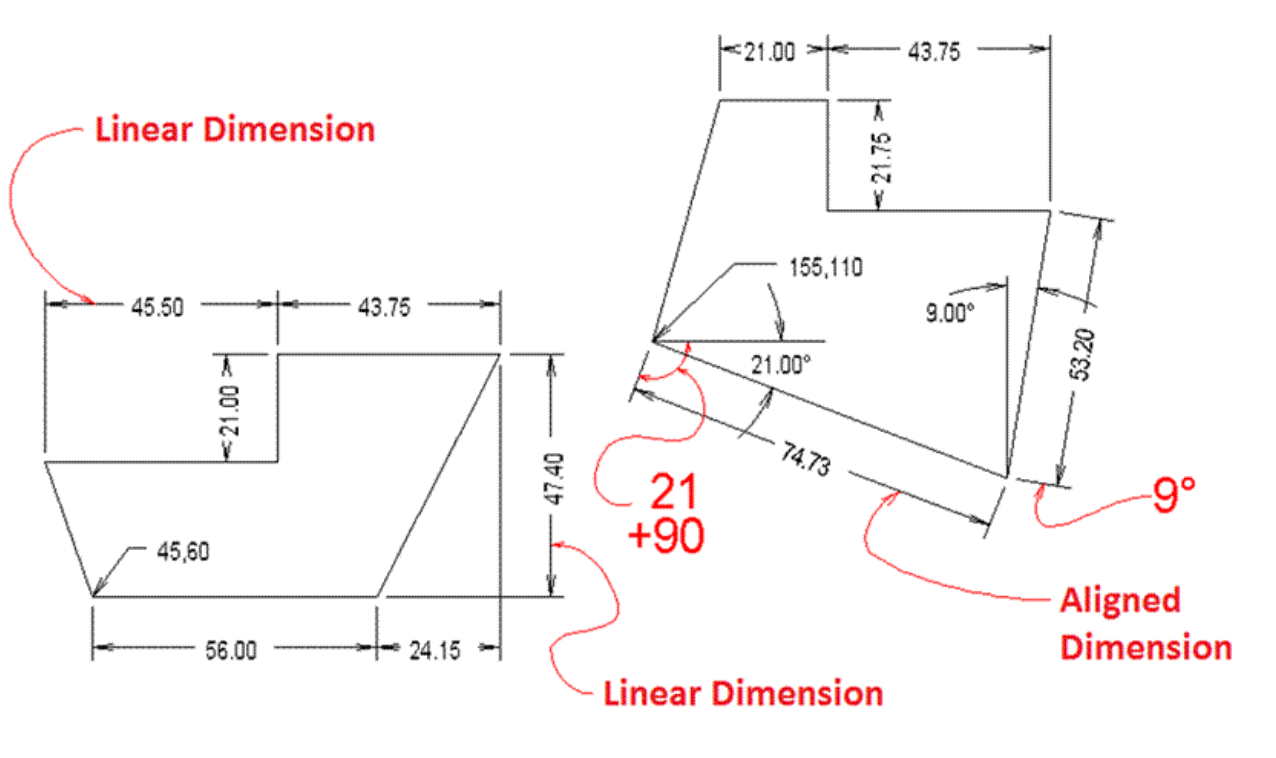
DIMENSIONING
1. Change to the DIMENSIONS layer. 2. Dimension the shapes as shown. See the Notes on DIMENSIONING. 3. Remember that dimensions should be 10mm away from the object, then 8mm after that. 4. Under the Annotation toolbar select the appropriate Dimension type. |

|


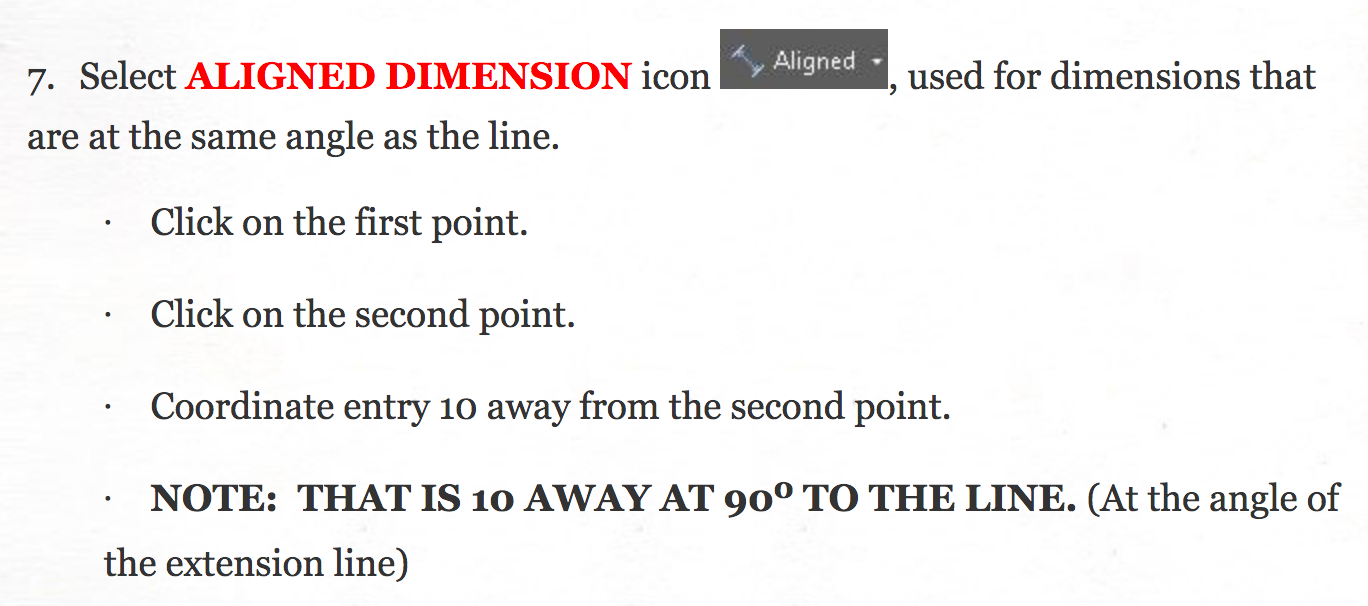
· Click on the first point.
· Click on the second point.
· Coordinate entry 10 away.
· To do a second dimension the same distance from the object, OSNAP to the first dimension line.
· Click on the second point.
· Coordinate entry 10 away.
· To do a second dimension the same distance from the object, OSNAP to the first dimension line.
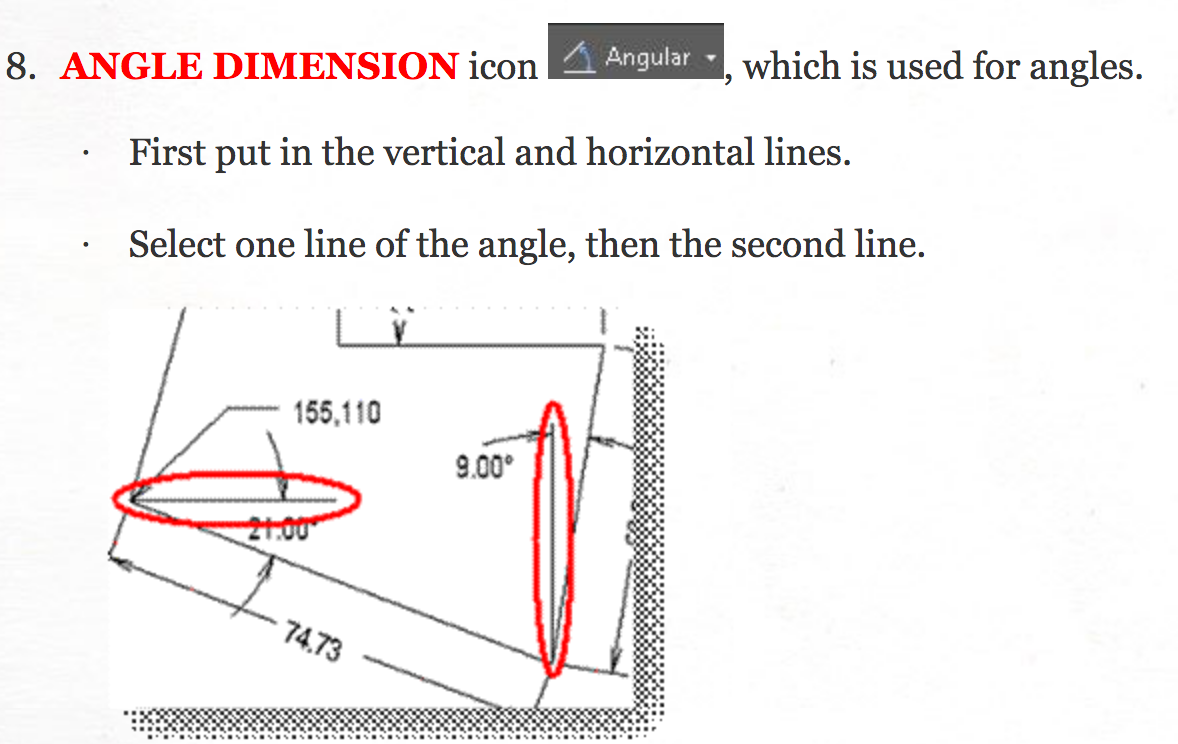
· Select between the lines where you wish the angle.
· If the area is too small to put the angle in then you can relocate the text.
· To relocate text, click on the number and then click on the blue Grip box, and then move the text.
· NOTE: YOU MAY NEED TO MODIFY THE DIMENSION STYLE TO GET HORIZONTAL TEXT.
9. Under the Annotation toolbar select the MULTILEADER icon , which is used to make leader lines for the starting coordinates.
· Select the start point.
· Draw the line of the leader, at an approximate 60o angle.
· Lastly, draw a short horizontal line (3 to 5mm), then hit enter twice to complete.
|
Review: Printing / Plotting Your Drawing
1. Fill out the Titleblock with the new Title, Assignment Number, Date (scale should already be 1:1). 2. Switch to Layout/Paper Space. 3. Select the Viewport box and at the bottom right of screen, open the scale settings and set the scale to 1:1 if it has changed. |

|
4. PRINT (also known as PLOT) your drawing.
5. SAVE your drawing to save the print / plot settings.
6. Hand in your drawing to the instructor for marking.
5. SAVE your drawing to save the print / plot settings.
6. Hand in your drawing to the instructor for marking.
