ICEBREAKER!
| day_1_photography_scavenger_hunt.docx |
Beginner's Photography Course
Skill #1: Getting to Know Your Camera
I apologize to the folks who know what all the buttons do all of the time on the camera. However, as a starting point there's probably a few buttons on the camera that you do not know yet. This includes the options on the dials! So here is a short activity that will help you get to know the DSLR better.
In this school, we will be looking at Canon Brand Digital Cameras. Most cameras have features that perform similar functions; the options you will be looking at are not necessarily unique to Canon because you can find most of these settings and buttons on the Nikon, Olympus, Fuji, Casio, Sony, etc brands.
One of the greatest challenges the current generation has is to use unlimited knowledge at your finger tips. While I could have made a lengthy resource for you to study about what all the buttons do I decided to allow you to use the internet to find the information you need. Even though this may take longer, it is an important skill to learn. In this class you will be consulting the internet to answer your questions, so now is a good time to start searching for answers. Finding the correct answers starts with asking the right questions. If you need help with your questions please let me know!
Step #1: Get a camera
- Sign it out properly
- Bring it to your desk
- You will not need to go anywhere
Step #2: Create a table
- Do not literally build a table
- On your website create a table (like the one provided) in your Assignments Page
- Sign it out properly
- Bring it to your desk
- You will not need to go anywhere
Step #2: Create a table
- Do not literally build a table
- On your website create a table (like the one provided) in your Assignments Page
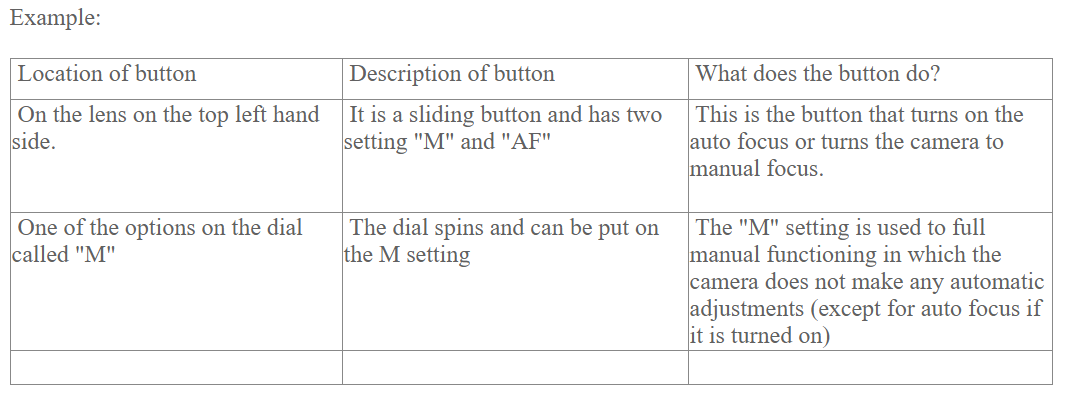
Step #3: Fill in the table
- Go through all the buttons and fill in the table
- Some of the cameras are slightly different and may have a different layout for buttons and number of buttons
***This is a very important step as I have found that by missing this basic knowledge students have a hard time and make mistakes in future lessons. ***
Skill #2: Shot Skills
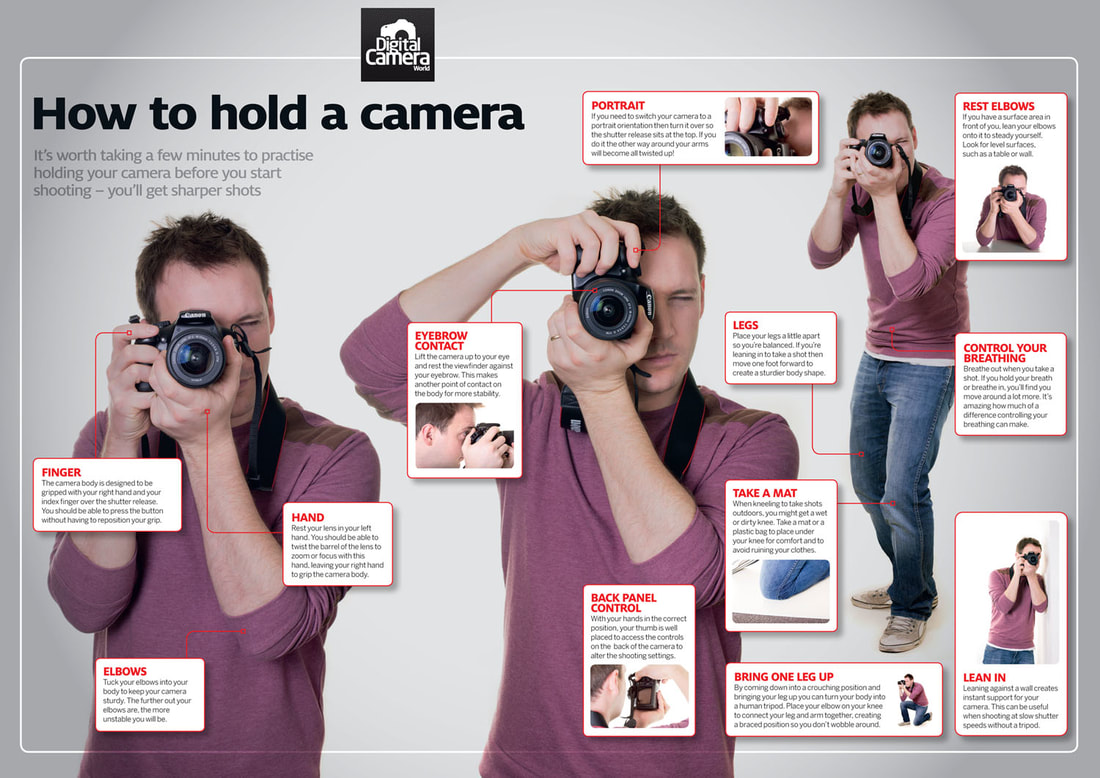
Since we are using Canon DSLR Cameras, study the following poster on how to hold a camera properly and then watch the 2-minute YouTube video below.
The basics of understanding the different types of shot skills are shown in the PowerPoint below:
| _1__shot_skills_1.pptx |
Step #1
- Look at the PowerPoint Presentation above.
Step #2
- Get a camera (you can use your own or use one from the school)
Step #3
- Go take the following pictures: Extreme Long shot, Long Shot, Medium Shot, Close up, and Extreme close up
- ALL PHOTOS MUST HAVE THE SAME SUBJECT TO SHOW PROPER COMPARISON.
-Take many pictures and use your artistic judgement to choose the best one, for each shot. I expect quality, artistic photographs, not just the first one taken.
Step #4
- On your Photography page in your website, TITLE your assignment Shot Skills and then post your best example of each as well as LABEL each one of those photos.
Skill #3: Understanding the basics of Adobe Photoshop Part 1
Go to the following website and click on the blue GET FILES button to download the files to work with.
https://helpx.adobe.com/photoshop/how-to/graphic-design-basics.html
- Follow the 5 video tutorials to create the cow/sun/text layer assignment.
- Upload the finished assignment to your Photography page.
https://helpx.adobe.com/photoshop/how-to/graphic-design-basics.html
- Follow the 5 video tutorials to create the cow/sun/text layer assignment.
- Upload the finished assignment to your Photography page.
Skill #4: Understanding the basics of Adobe Photoshop Part 2
Now that we have gone over the basic of photography, we can get into photography challenges, and advanced Photoshop techniques.
1. Click on the following link and go through the PHOTOSHOP tutorial. Download the files and follow along with the videos. This tutorial will give you the skills to adjust your photographs and make the colors more vibrant.
https://helpx.adobe.com/photoshop/how-to/photo-editor.html
2. Upload the finished assignment to your Photography page.
Skill #5: Selective Colouring


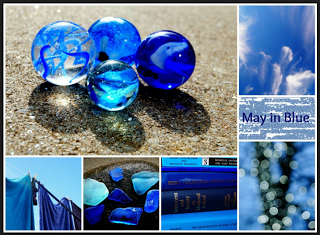
This is a type of custom photography edited by photographers to bring out emphasis on a certain point in an image. Watch the tutorial below to learn how to create one of these images, then do the assignment and upload it onto your photography webpage.
- Choose a focal color.
- Go out and take as many pictures, focusing on that color.
- Pick your favourite photos
- Edit them for selective color.
- Collage photos in Photoshop.18x18inches 300dpi. (Your colour splash photograph should be the main/central image in the collage)
Skill #6: Portraits
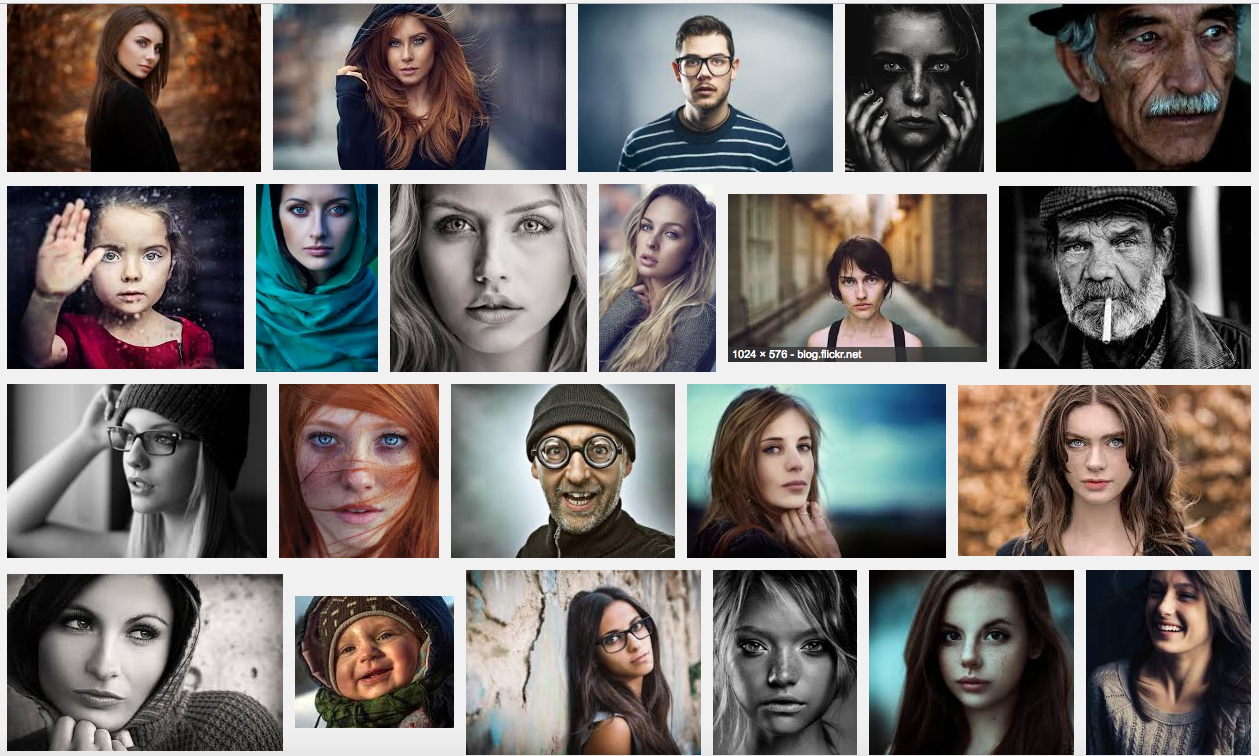
Portrait photography or portraiture is photography of a person or group of people that captures the personality of a subject by using effective lighting, backdrops, and poses.[1] A portrait picture might be artistic, or it might be clinical, as part of a medical study.[1]Frequently, portraits are commissioned for special occasions, such as weddings or school events.[1] Portraits can serve many purposes, from usage on a personal Web site to display in the lobby of a business.[1] -Wikipedia
“Portrait Photography.” Wikipedia, Wikimedia Foundation, 21 Aug. 2017, en.wikipedia.org/wiki/Portrait_photography.
Look at the following portraits and ask yourself the following questions:
“Portrait Photography.” Wikipedia, Wikimedia Foundation, 21 Aug. 2017, en.wikipedia.org/wiki/Portrait_photography.
Look at the following portraits and ask yourself the following questions:
- How much of the person do you see?
- What part of each portrait stands out?
- How did the photographer use lighting in the picture? (Natural or artificial, was a reflector used?)
- What do you notice about the background?
- Does this portrait look like it has been edited in Photoshop?
Task:
1. Sign out a camera and ask people if you can take their picture. Always get permission before you take someone's picture!
2. Take many different portraits of subjects. Switch up the environment! Take some pictures indoors and some outdoors. Play with lighting and a reflector. You are welcome to use the green room with the teacher's permission.
3. TAKE MORE PICTURES! The only way you will become a better photographer is by taking MORE pictures!
Open Photoshop and import the photos that you feel are your best photographs. Feel free to share your photos with others, and get constructive feedback.
Use the following tutorials to improve your portraits.
Tutorials:
|
|
|
|
4. Feel free to look up other tutorials.
5. Edit at least 4 of your favorite portraits. I want to see the following.
5. Edit at least 4 of your favorite portraits. I want to see the following.
- Erase blemishes with the Spot Healing Brush.
- Brighten colours (eyes, whiten teeth, and any other colours you think should pop).
- Blur Background.
- Let me know of any other adjustments you make.
- Post both the originals and adjusted Portraits on your website and give a written explanation of what you adjusted in Photoshop.
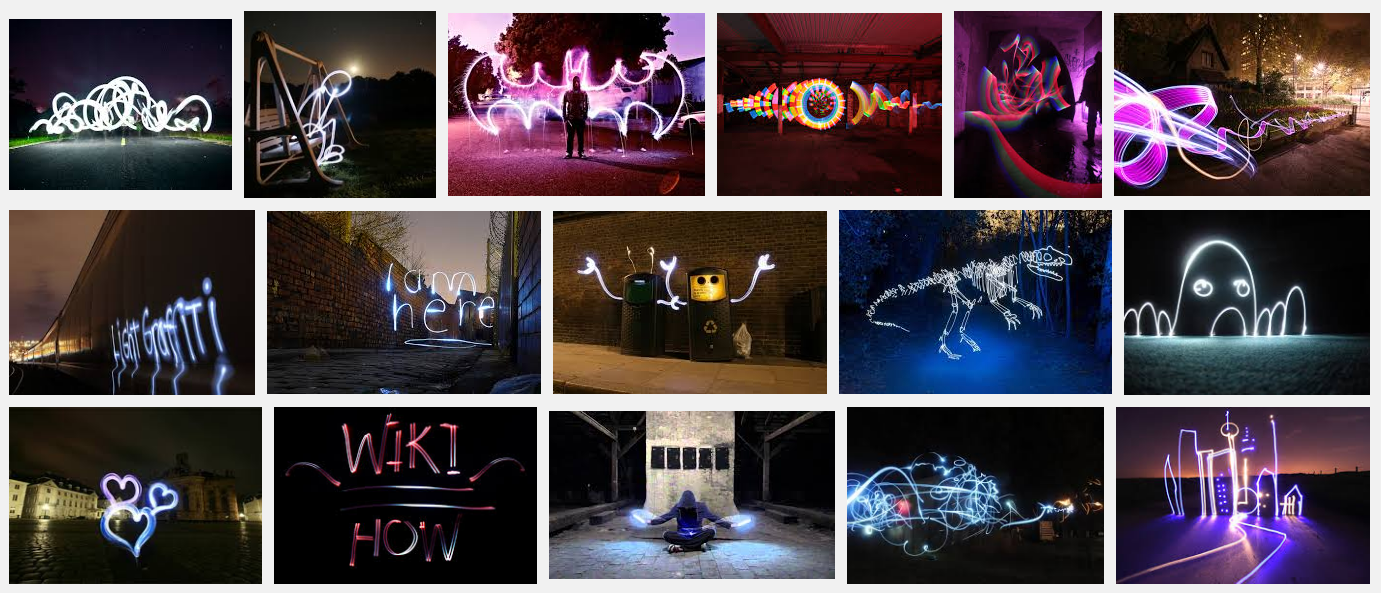
Skill #7: Light Graffiti
To give you a sense of further techniques in the following courses, watch the video below to learn about manual settings:
Time to get your glow on!
Light graffiti uses a light source, (a cell phone flashlight works well), a dark room/location, a tripod(otherwise your pictures will come out blurry), and a camera that allows a very slow shutter speed (10-30 seconds is recommended), and creativity. You may want a partner to help you draw, write, or be a model.
Indoors
1. Use a dark room.
Outdoors
Assignment
1. Use the information above, and play around with light writing. You may want to get light sticks or sparklers to create a different effect. you can also put tape over your phone light, and color it with markers.
2. Take many pictures!
3. I will want to see the following:
Light graffiti uses a light source, (a cell phone flashlight works well), a dark room/location, a tripod(otherwise your pictures will come out blurry), and a camera that allows a very slow shutter speed (10-30 seconds is recommended), and creativity. You may want a partner to help you draw, write, or be a model.
Indoors
1. Use a dark room.
Outdoors
- The time you go will depend on how well-lit the area is. If there isn't much lighting, go at sunset. You'll need at least a little bit of light so the objects come out in the picture. If the area has streetlamps and other sources of lighting nearby, you should be fine going at night.
- Mount your camera on the tripod. It's really important that you have a tripod to mount your camera on. If you don't, your pictures will come out blurry.
- You'll need to adjust your camera settings to have a long shutter. It varies depending on how your camera is designed. Set it to as much time as you need (15-30 seconds is usually good).
- Take the picture and try not to move the camera. Point the LEDs directly at the camera as you draw in the air. You'll need to play around with different techniques.
- If objects you want in the picture come out dark, shine a bright flashlight (like a Maglite) at the object for a second or two before the end of the frame.
- Show off your work!
Assignment
1. Use the information above, and play around with light writing. You may want to get light sticks or sparklers to create a different effect. you can also put tape over your phone light, and color it with markers.
2. Take many pictures!
3. I will want to see the following:
- Light writing.
- Draw a picture.
- Use a model and draw around them.
