· Open your Titleblock and SAVEAS Template.
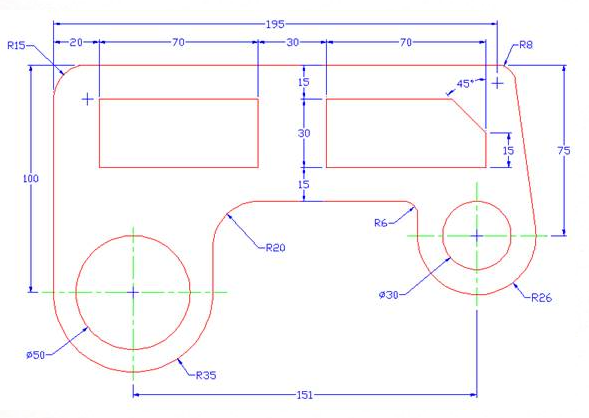
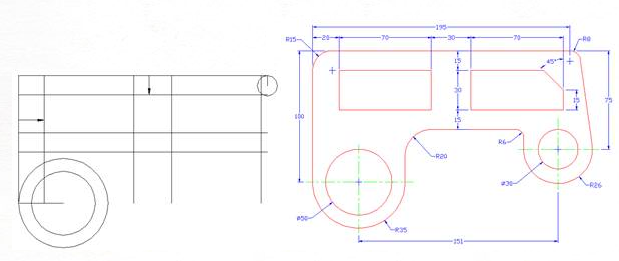
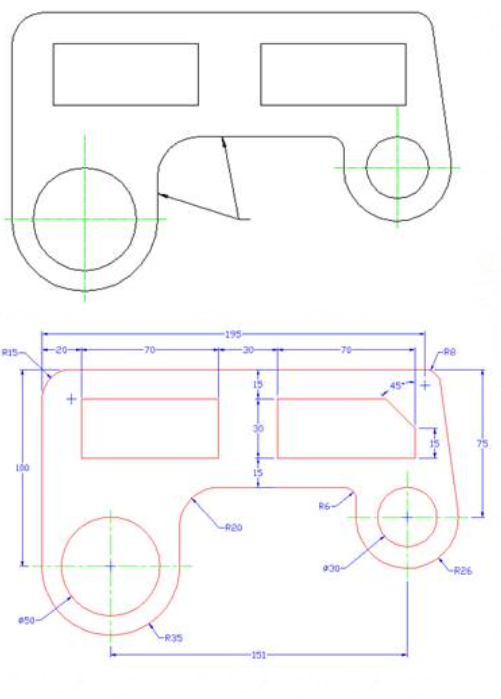
· Draw the following and with centerlines and dimensions.
· Center the drawing and print the drawing out.
· See below for hints.
· Draw the following and with centerlines and dimensions.
· Center the drawing and print the drawing out.
· See below for hints.
|
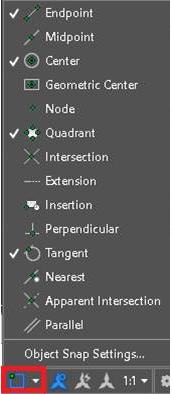
Important Snaps for this Drawing:· Open the OSnap toolbar to select what Object Snaps are needed
Quadrant- Snaps to the closest quadrant of an arc, circle, or ellipse (The 12, 3, 6, or 9 o’clock position).
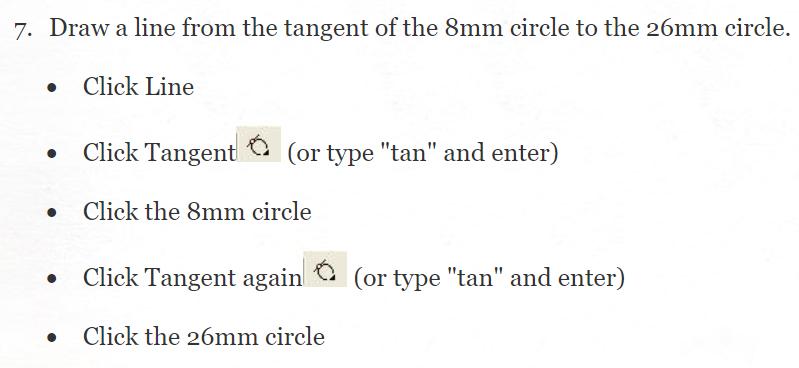
Tangent- Snaps to the point on a circle or arc that, when connected to the last point, forms a line tangent to that object. For example, when you use the three-point method to draw a circle, you can use Tangent to construct a circle tangent to three other circles. There are many ways of completing this drawing. Here is one of them:
|
|
|
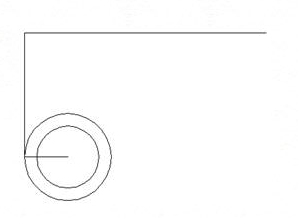
Step 1: Start by drawing the 2 circles on the left.
|

|
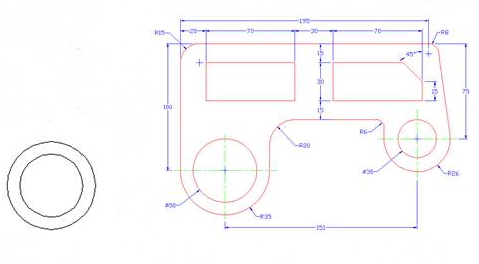
Step 3: Then draw the line down to the center of the arc and draw another circle to the correct size.
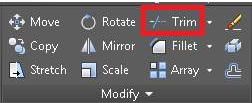
Step 5: Draw a vertical line up from the left circle the Trim the lines to their proper lengths and the top of the circle. Select Trim then right click to make all lines trim lines then select line ends to trim.
|
Step 4: Copy down the top line and the left line over as needed.
|
|
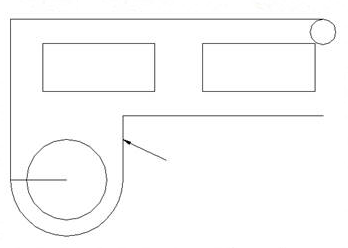
Step 6: Locate the center of the right circle and arc by drawing or copying lines over and down.
· Draw the circles on the right side. · Draw line up from quadrant on left side of right circle 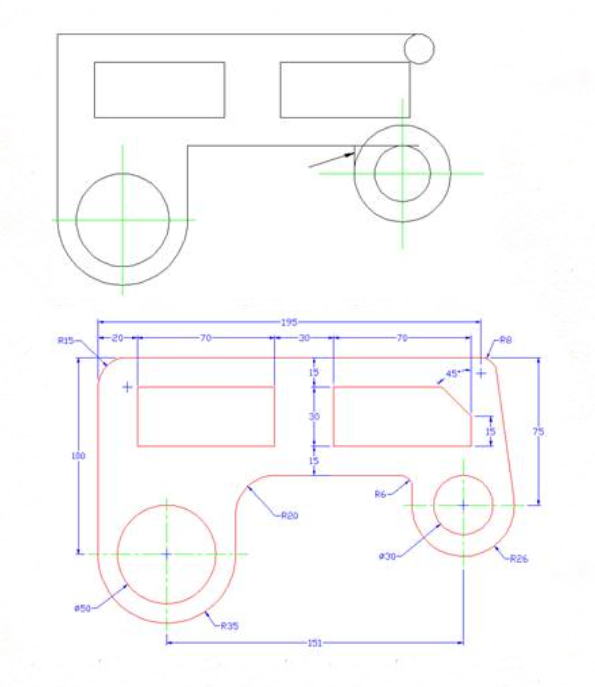
|
|
Step 8: Trim.
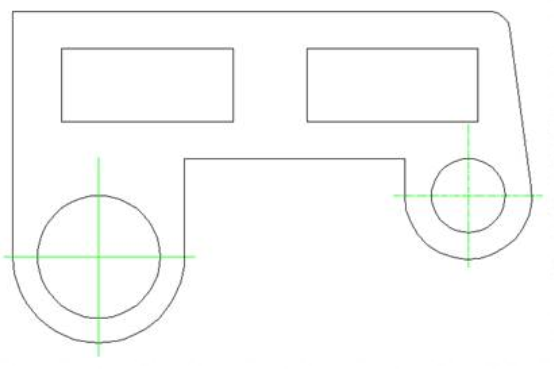
Step 9: Fillet the required corners their specified radius.· Select Fillet
· Type in “r” for radius then specify the radius of the fillet
· Select the 2 lines that you wish to fillet.
· Type in “r” for radius then specify the radius of the fillet
· Select the 2 lines that you wish to fillet.
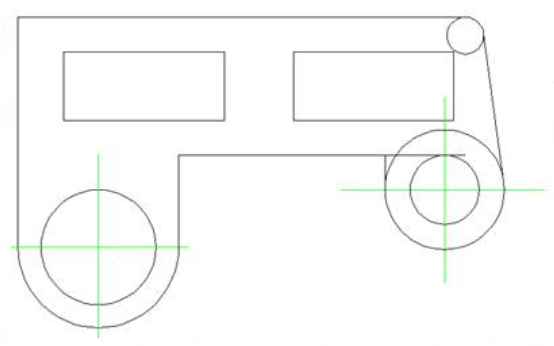
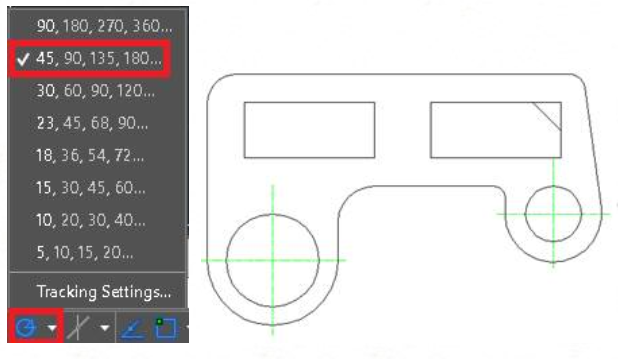
Step 10: Draw a 15mm line from the corner of the second box.
· With Polar Tracking set to 45°, draw a line to intersect with the top line.
(Right Click on Polar at the bottom of your screen to change settings.)
· With Polar Tracking set to 45°, draw a line to intersect with the top line.
(Right Click on Polar at the bottom of your screen to change settings.)
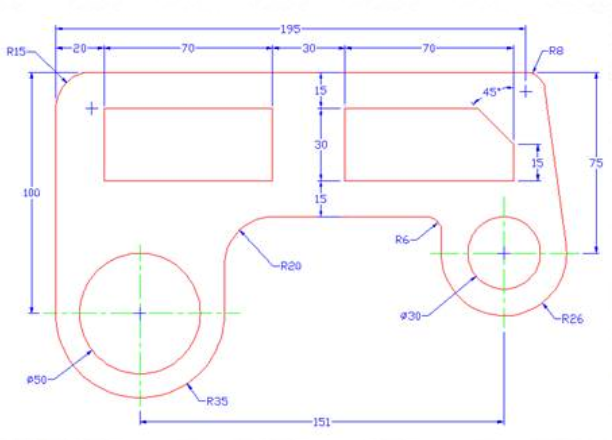
Step 11: Trim lines and dimension.
· Note: Remember to change LTscale if needed for center lines to show up.
· Note: If linetypes do not show in Layout view then type PSLTscale and set to "0". Lastly, in model space type RE to regenerate the drawing.
· Note: Click and follow to remove the R6 and R20 fillet dimension arc.
· Note: Remember to change LTscale if needed for center lines to show up.
· Note: If linetypes do not show in Layout view then type PSLTscale and set to "0". Lastly, in model space type RE to regenerate the drawing.
· Note: Click and follow to remove the R6 and R20 fillet dimension arc.
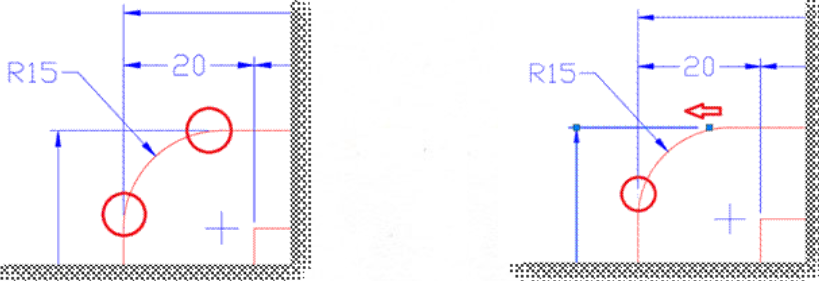
Step 12: Pull back the extension lines of the dimensions on the curved corners until you get about a 1mm gap when printed.
Finally: Set to scale in Layout View, center, print out, have a student check over for errors then hand in.
