Print and Design
Setting Up Adobe Illustrator:
Open Illustrator, and a welcome screen will appear. Under Create New, choose Print Document. On the next screen, called New Document, give your document a name. Most of the defaults are fine, but confirm that number of artboards is set to 1 (an ‘artboard’ is a page), and Size is set to Letter. Click OK.
The default workspace that opens, called Essentials (noted at the top right of your screen), features a typical menu across the top of the screen (File, Edit, etc.), a context-sensitive bar underneath, with buttons that change based on the tool you are using, the Tools panel along the left side, and icons representing several other panels along the right. Use the arrows at the top of these icons to expand the icons into panels. Your first task is to organize these panels in a way that makes sense.
To close the panels that you won’t need regularly, right
-click on their names and select Close. Close the Color, Color Guide, Brushes, Symbols, Gradient, Transparency, and Graphic Styles panels. Drag the Swatches panel and drop it beside the Stroke panel (not above or below it), so they are in a tabbed display format. To what is left, add panels you will want: from the Window menu select Align. Drag the Align panel (leave Transform and Pathfinder behind) over to the panels docked at the right and drop it beside the Appearance panel. Appearance and Align will now be tabbed together. Close Transform and Pathfinder. Return to the Window menu and under Type select Character. The Character panel will open along with Paragraph and Open Type. Close Open Type and drag the combined Character and Paragraph panels between (not on top of or beside) Appearance/Align and Layers.
Reorder your docked panels by clicking and dragging so that you have, from top to bottom, Appearance/Align, Layers,Stroke/Swatches, and Character/Paragraph.
If the vertical array of panels is too crowded, some panels will automatically minimize, leaving just their name visible. If this happens, double-click the panel name to maximize it. (This may result in other panels minimizing.) Some panels have different sizes and layouts available; toggle through these by clicking the small arrow to the right of the panel name (if present).
Next, open the Illustrator menu and select Preferences, then Units & Display Performance. Change General from Points to Inches. Click OK.
Under the View menu, select Show Rulers. Under the File menu, set the Document Color Mode to CMYK.
Last, save this layout of panels as your MEDART12 Workspace: From the Window menu select Workspace and then Save Workspace. Call it MEDART12. From now on you will always be able to revert to this Workspace whenever you log in and open Illustrator. It will always be listed in the Window menu under Workspace.
|
Concept:
You will create print/graphic designs using Adobe In Design or Illustrator.
Click on the following link for Adobe InDesign Tutorials. http://helpx.adobe.com/indesign/topics/indesign-tutorials.html Set your poster size as 8.5in x 11in. Final posters will be printed off to be displayed in the school. Here is a video that shows 11 different types of advertising. Next, check out the AdCracker website to go over advertising techniques.
http://www.adcracker.com/techniques/Advertising_Techniques.htm Google: Magazine Advertisements , and click on images for inspiration. Skills Mastery List:
Oral Presentation:
Written Report:
Counts towards the quality assessment of the digital portfolio. |
Task #1: Visual HierarchyDetermine your target audience and develop a design that will attract your fellow peers to take notice to your poster. You will also need to submit a written report and prepare an oral presentation to be given in class. The print should be in colour. It should be clearly drawn with thought given to style of script and layout.
The written report must contain the following information:
The oral presentation will be given to the class and your teacher. The focus of your oral presentation is the audience to hire you to advertise their product. Imagine they are the company that makes your product. You are the advertising company looking to get their business. Convince them that you have a unique and effective ad campaign that will improve their sales. Both the advertisement and the report will be posted together on your website, under the Print and Design page. Criteria for the Ad will be created by the class, but if photographs are used, they will be your own photographs. You cannot download images off the internet. | ||
In the Spirit Magnet Assignment
Inspirational Mug Assignment
Concept: |
Task #3:Leading/Tracking/Kerning |
Assignment #4: T-Shirt Logo Design
Concept:Logos surround us in digital and physical space, but we rarely examine the thought and artistic thinking that goes into the design of these symbols. Utilizing a silent vocabulary of colors, shapes, and typography, logo designers give a visual identity to companies and organizations of all types. From cave painters to modern designers, artists throughout history have been reducing the complex down to simple ideas that communicate with the world.
|
Task #4: Raster Vs. Vector/3D Design/Perspective DrawingBefore designing your logo or image to put on your T-shirt, consider the following questions:
Step #1: Create a point form list of words to describe you or what your production company is about. Step #2: Please choose either the Pen Line Tool Tutorial or the 3D Logo Video to read/watch. Step #3: Begin creating a design. You may create 2 or 3 designs before you find one that embodies you and your design/production company. Step #4: Go back to your design and edit it one last time before uploading your final copy to your digital portfolio. ADVANCED LEVEL MEDIA ARTS: Step #1: Please watch the Raster vs. Vector Video AND ALSO the Top 5 Favourite Illustrator Features Video Step #2: Create a Vector Logo design that uses the Perspectives Tool and the Draw Inside Tool. |
INSPIRATION BOX:
|
Check out the logo designed by Aaron Mathias in 2016!
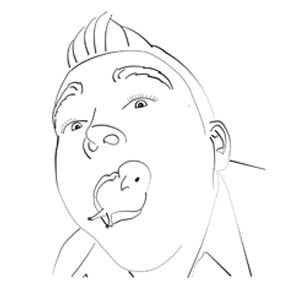
For a quick tutorial on how he did this, go to this link below:
Pen Line Self Portrait Tutorial: |
3D Logo
|
INSPIRATION BOX
|
Turn a RASTER image into a VECTOR
|
Draw Inside Text
|
Skills Mastery List:
Did you answer the first 2 key point questions /2
Logo was created to represent the key points /1
Does your logo incorporate a suitable name that matches the design /1
Logo shows up clear as a vector image /1
Did you answer the first 2 key point questions /2
Logo was created to represent the key points /1
Does your logo incorporate a suitable name that matches the design /1
Logo shows up clear as a vector image /1
Animating Your Logos:
You will animate your logo or create a new animated logo for an introduction to your video's.
Check out the following link for animated logo creation in Adobe After Effects.
Check out the following link for animated logo creation in Adobe After Effects.
Assignment #4:
Step #1: YouTube search Adobe After effects CS5 Logo Animation, and pick a tutorial of your choice and incorporate your logo into it.
Step #2: Once you have created 2 logo animations, upload them onto your portfolio.
Step #2: Once you have created 2 logo animations, upload them onto your portfolio.
INSPIRATION BOX:
SIMPLE EXPLOSION- The following tutorial shows you how to insert your logo so it appears to explode onto the screen.
